

Collecting leaves from a park or woodland trail feels like bringing nature’s palette straight to your table. You might expect it’s just some crafty fun for a rainy day. Yet the real surprise is that the quality and variety of leaves you gather will directly shape the beauty of your final artwork, turning a humble afternoon activity into something truly captivating.
Table of Contents
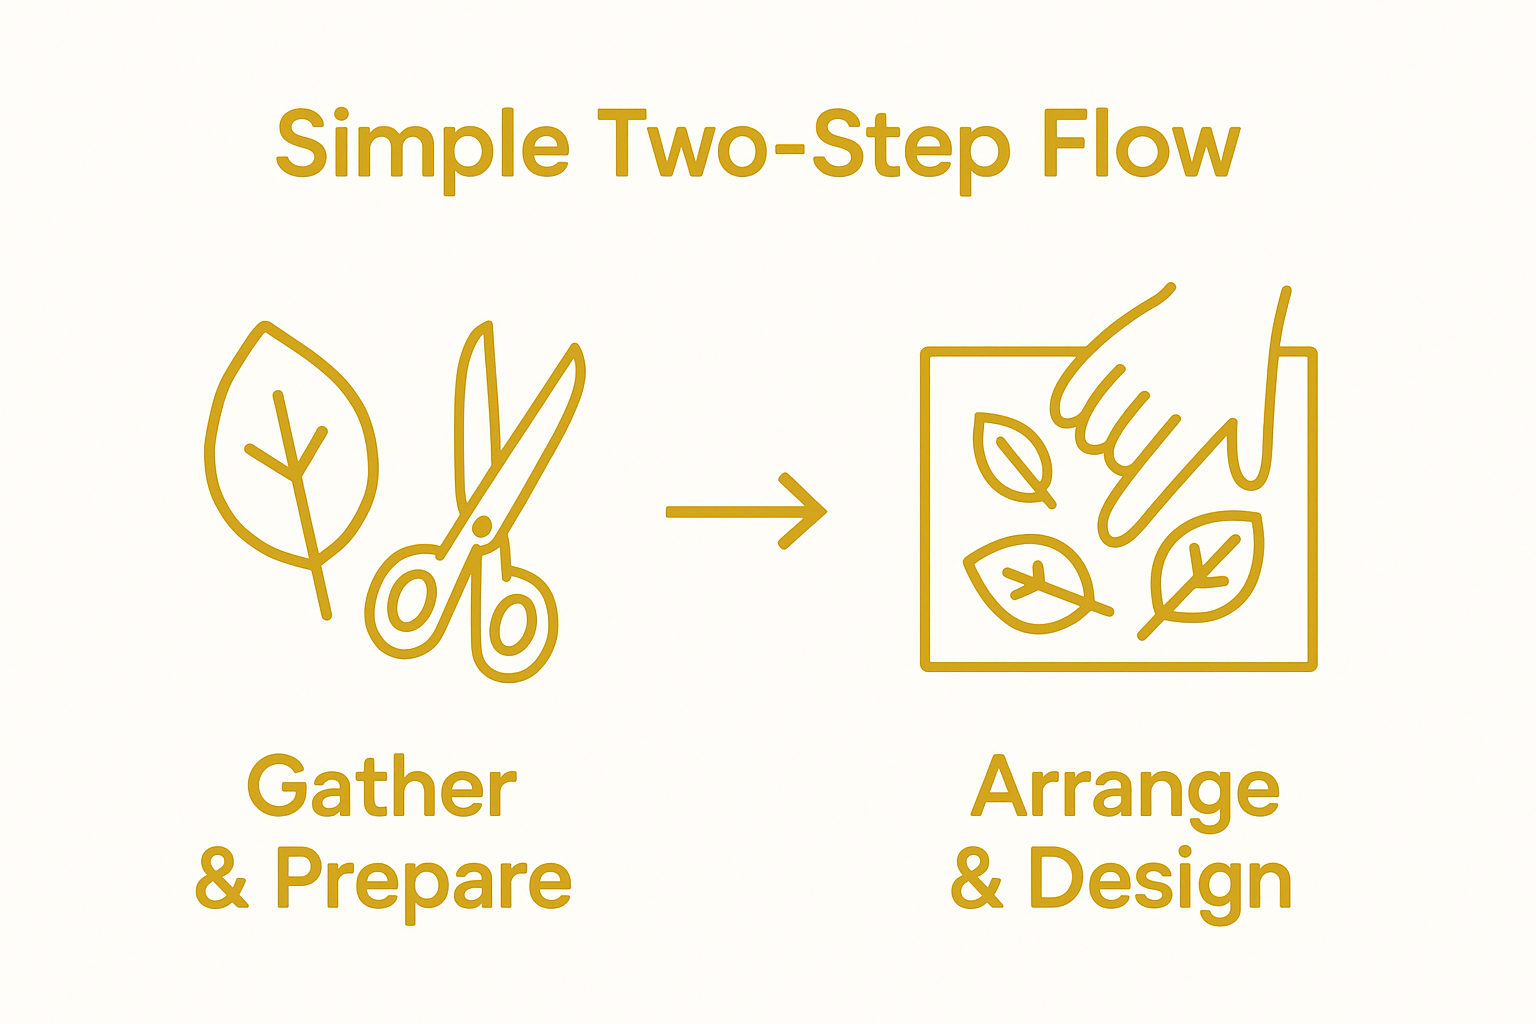
- Step 1: Gather Natural Materials And Tools
- Step 2: Prepare Your Working Space
- Step 3: Select And Arrange Your Leaves
- Step 4: Apply Techniques For Creating Leaf Art
- Step 5: Finalise And Protect Your Leaf Artwork
Quick Summary
| Key Point | Explanation |
|---|---|
| 1. Collect diverse, intact leaves | Choose fresh leaves with unique shapes, colours, and textures for better artistic results. This diversity enhances your creative options. |
| 2. Organise a clutter-free workspace | Set up your crafting area with organised zones for sorting, cutting, and preserving to maintain focus and encourage creativity. |
| 3. Experiment with multiple leaf art techniques | Try various methods like leaf printing or collage to discover unique ways to showcase your leaf creations. Each technique offers different aesthetic possibilities. |
| 4. Preserve artwork for longevity | Use archival spray or lamination to protect finished pieces from moisture and UV damage, ensuring your art lasts longer. |
| 5. Document your creations | Take high-quality photographs of your artwork to keep a permanent record of your creative expressions and the details that may fade over time. |
Step 1: Gather Natural Materials and Tools
Making leaf art begins with selecting and preparing the right natural materials. Your creative journey starts in nature’s own workshop - whether it’s your backyard, local park, or a woodland trail. The quality and variety of leaves you collect will directly impact the beauty of your final artwork.
When gathering materials, timing and technique are crucial. Learn more about nature exploration with children can enhance this experience. Choose leaves that are fresh, flexible, and free from significant damage. Look for leaves with interesting shapes, vibrant colours, and unique textures. Maple, oak, birch, and elm leaves often provide excellent artistic potential due to their distinctive structures.
Your essential toolkit for leaf art should include:
- Sharp scissors for precise cutting
- Tweezers for handling delicate leaf edges
- Preservation materials like wax paper or heavy books
- White glue or craft adhesive
- Watercolour paper or sturdy cardstock
- Protective work surface covering
Preparing your leaves requires gentle handling. After collecting, carefully press them between pages of a heavy book or magazine, using clean, dry parchment paper to prevent sticking. Allow them to dry completely for 3-5 days, which helps maintain their shape and prevents mould growth. Some leaves might need light ironing between protective cloths to flatten them perfectly.
Remember that not all leaves are suitable. Avoid leaves that are too brittle, significantly torn, or showing signs of disease. Select specimens that are relatively intact and demonstrate interesting colour variations or unique vein patterns. Diversity in your leaf collection will provide more creative possibilities for your artwork.
Once collected and prepared, store your leaves in a cool, dry place away from direct sunlight. Organise them by size, colour, or type to make your crafting process smoother.
Here is an at-a-glance overview of essential tools and materials for making leaf art, including their purposes to help you prepare effectively.
| Tool/Material | Purpose |
|---|---|
| Sharp scissors | For precise cutting of leaves and trimming edges |
| Tweezers | Handling delicate leaf edges and positioning leaves accurately |
| Preservation materials | Wax paper or heavy books for pressing and drying leaves |
| White glue or adhesive | Attaching leaves securely to paper or card |
| Watercolour paper/card | Serves as a sturdy, textured backing for your artwork |
| Protective covering | Shields your working surface from glue, paint, and moisture |
| Clean, dry parchment | Prevents leaves from sticking during the pressing process |
| Small containers/trays | Useful for organising tools and materials on your workspace |
Step 2: Prepare Your Working Space
Transforming natural leaves into beautiful art requires a thoughtfully organized workspace that supports creativity and minimizes potential mess. Setting up your crafting area is more than just clearing a table - it’s about creating an environment that nurtures artistic expression. Explore our guide on creative spaces to inspire your artistic setup.
Choose a workspace with ample natural light and a flat, stable surface. A kitchen table, craft desk, or sturdy dining room surface works perfectly. Cover your workspace with a protective layer such as a plastic tablecloth, old newspaper, or a disposable craft mat. This precaution will safeguard your surface from glue, paint, and potential leaf stains.
Your workspace organization should include dedicated zones for different stages of leaf art creation:
- Leaf sorting and selection area
- Cleaning and preparation zone
- Workspace for cutting and arranging
- Drying and preservation section
Ensure all your gathered materials from the previous step are within easy reach. Arrange your tools systematically: place scissors, tweezers, and adhesives in a small container or tray for quick access. Keep a trash bin nearby for immediate disposal of leaf fragments or scraps, maintaining a clean and efficient workspace.
Temperature and humidity play critical roles in leaf art preparation. Select a room with consistent temperature and moderate humidity. Avoid areas near heating vents or direct sunlight, which can cause leaves to become brittle or fade quickly. If your workspace tends to be dry, consider keeping a small spray bottle of water nearby to lightly mist leaves that might be becoming too crisp.
Prepare additional supporting materials like paper towels, wet wipes, and a small bowl of water for cleaning hands and tools. Wearing an apron or old shirt can protect your clothing from potential stains. If working with children, consider laying down a dropcloth or using washable surfaces to make cleanup easier.
Before beginning your leaf art project, do a final workspace check. Ensure all materials are organized, tools are accessible, and your surface is properly protected. A well-prepared workspace not only makes the creative process more enjoyable but also helps you focus entirely on the artistic transformation of your natural materials.
Step 3: Select and Arrange Your Leaves
Leaf selection is the artistic heart of your creative journey, transforming simple botanical materials into expressive artwork. The way you choose and position your leaves will determine the emotional impact and visual storytelling of your final piece. Discover creative nature exploration techniques to inspire your artistic process.
Begin by spreading your collected leaves on a clean, flat surface. Sort them by size, colour, and texture, creating a natural palette that will guide your artistic vision. Look for leaves with interesting characteristics: some with delicate veins, others with vibrant autumn colours, and some with unique shapes that might suggest animal forms or abstract designs.
Consider the visual potential of each leaf by examining these key characteristics:
- Colour variation and intensity
- Leaf shape and symmetry
- Vein patterns and structural details
- Size and potential for layering
- Condition and flexibility
Arranging leaves is like composing a visual story. Start by creating loose compositions without gluing, allowing yourself to experiment freely. Try positioning leaves to create silhouettes of animals, landscapes, or abstract patterns. Rotate and overlap leaves to discover unexpected visual relationships. Some artists find inspiration by laying leaves out completely flat, while others prefer creating three-dimensional effects through strategic layering.
Pay attention to colour harmony and contrast. Autumn leaves offer a rich palette of yellows, oranges, reds, and browns that can create stunning monochromatic or complementary designs. If your leaves are starting to dry, you can carefully rehydrate them by lightly misting with water or placing them between damp paper towels for a few minutes.
Don’t rush the arrangement process. Take time to step back and view your composition from different angles. Natural light can help you appreciate subtle colour transitions and leaf textures. If a particular arrangement doesn’t feel right, simply rearrange the leaves until you achieve a composition that speaks to you.
Once you’re satisfied with your preliminary design, take a photograph as a reference. This allows you to experiment without fear of losing your original concept and provides a backup if leaves shift during the gluing process. Your carefully selected and arranged leaves are now ready to be transformed into a unique piece of natural art.
Step 4: Apply Techniques for Creating Leaf Art
Transforming your carefully selected leaves into beautiful artwork requires creativity and thoughtful technique. Your chosen method will define the character and emotional resonance of your final piece. Explore nature crafting techniques to inspire your artistic journey.
Leaf art offers multiple creative approaches, each producing unique results. Leaf pressing is a fundamental technique where you carefully flatten and preserve leaves between heavy books or specialized presses. This method allows you to create delicate, two-dimensional artwork that captures the intricate details of each leaf’s structure.
Leaf art techniques you can explore include:
- Leaf printing using watercolours or acrylic paints
- Leaf rubbings with crayons or coloured pencils
- Collage creation using whole or fragmented leaves
- Silhouette art by tracing leaf outlines
- Mixed media compositions incorporating leaves
For leaf printing, start by selecting leaves with pronounced veins and interesting shapes. Apply a thin layer of paint to the leaf’s underside using a foam brush or roller, ensuring even coverage. Carefully place the painted side onto watercolour paper or canvas, applying gentle, consistent pressure. Lift the leaf slowly to reveal a detailed natural impression. Experiment with different paint colours and leaf varieties to create complex, layered prints.
Leaf rubbings offer another engaging technique. Place a leaf underneath a thin sheet of paper, vein side up. Using the side of a crayon or coloured pencil, gently rub across the paper. The leaf’s intricate vein structure will magically emerge, creating a delicate, textured artwork. Try using multiple colours or layering different leaves to add depth and complexity to your design.
For those interested in three-dimensional art, consider creating leaf sculptures or relief artwork. Carefully bend and shape leaves while they are still pliable, using gentle heat or moisture to increase flexibility. Attach leaves using craft glue or create intricate woven designs that transform flat materials into sculptural forms.
Remember that patience and experimentation are key. Not every attempt will be perfect, but each technique teaches you something new about working with natural materials. Allow yourself to play, make mistakes, and discover unexpected beauty in the process. Your leaf art is a unique conversation between you, the leaves, and the creative spirit that guides your hands.
Below, find a comparison of different leaf art techniques you can explore, with their key features and the artistic effect each method produces.
| Technique | Materials Required | Key Feature | Artistic Effect |
|---|---|---|---|
| Leaf pressing | Leaves, heavy books, paper | Preserves leaf shape & colour | Flat, detailed, delicate |
| Leaf printing | Paint, brush, paper | Paints leaf underside for imprint | Bold, textural, multi-coloured |
| Leaf rubbing | Crayons, thin paper, leaves | Transfers vein pattern onto paper | Subtle, textured, layered |
| Collage | Leaves, adhesive, backing | Arranges leaves into images | Layered, creative, varied |
| Silhouette art | Leaves, pencil, paper | Outlines leaf shapes for design | Clean lines, graphic |
| Mixed media | Leaves, art supplies | Combines leaves with other media | Highly creative, dimensional |
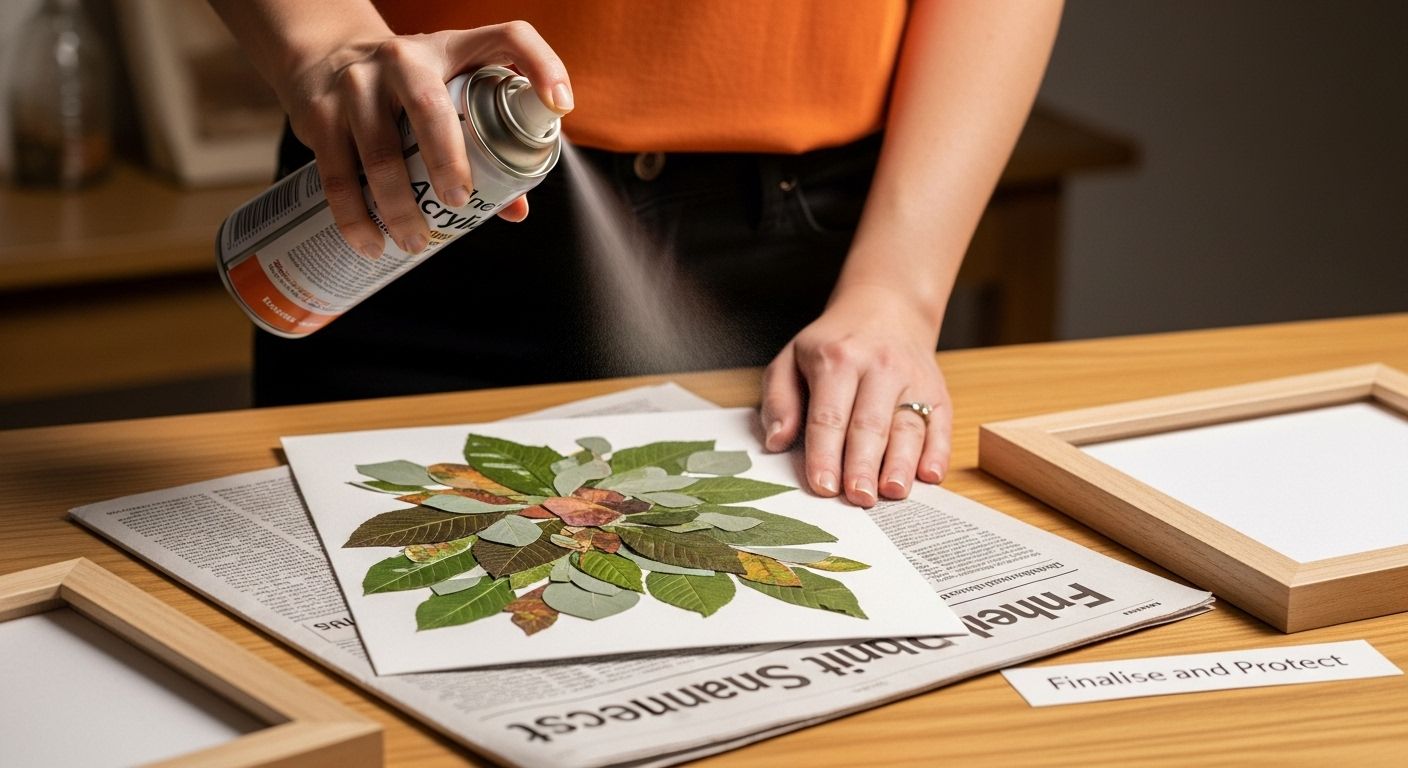
Step 5: Finalise and Protect Your Leaf Artwork
The final stage of leaf art transforms your delicate creation from a temporary craft into a lasting piece of natural artwork. Preservation is about capturing the ephemeral beauty of leaves and ensuring your creative expression endures. Explore nature conservation techniques to understand the importance of protecting organic materials.
Choosing the right protective method depends on your specific artwork and intended display. For flat leaf prints and collages, consider using archival quality sealants that protect against moisture and UV damage. Clear acrylic spray provides an excellent protective layer that maintains the leaf’s original colours while creating a subtle, professional finish.
Preservation techniques to consider:
- Lamination for lightweight, flat artworks
- Clear acrylic spray sealant
- Museum-grade preservation glass
- Acid-free mounting boards
- Protective clear contact paper
Carefully apply your chosen preservation method in a well-ventilated area, holding the spray or sealant at least 15 centimetres from the artwork. Use light, even strokes to prevent pooling or uneven coverage. Allow each layer to dry completely before applying additional coats. Multiple thin layers provide better protection than a single thick application.
Framing offers an additional layer of protection and presentation. Select frames that complement your artwork’s colours and style. For leaf art, wooden frames with natural tones work beautifully. Use acid-free mounting materials to prevent discolouration and deterioration over time. Consider adding a spacer between the artwork and glass to prevent moisture buildup and potential leaf damage.
Storage is equally important for preserving leaf art not immediately displayed. Store completed pieces in cool, dry environments away from direct sunlight. Use archival quality portfolio cases or acid-free folders to protect delicate artworks from dust and humidity. If storing multiple pieces, place acid-free tissue paper between each artwork to prevent sticking or colour transfer.
Finally, document your artwork through high-quality photographs. These images serve as a permanent record of your creative process, capturing the intricate details that might fade over time. Your leaf art is now a preserved testament to nature’s beauty and your artistic vision - a unique gift that celebrates the transient elegance of the natural world.
Bring Nature-Inspired Creativity to Life with The Zoofamily
Discovering new ways to connect with nature while sparking creativity is at the heart of making leaf art. If you are searching for meaningful ways to help your children appreciate the outdoors, the challenge is not only finding inspiring ideas, but also nurturing their curiosity about the environment. As explored in our article, the process of collecting natural materials, arranging leaf compositions and preserving artwork can deepen children’s appreciation for the world around them. But how do you make these experiences even more memorable and engaging?

At The Zoofamily, we offer tools and inspiration to turn every leaf adventure into a lasting memory. Our kids’ cameras are designed with playful animal motifs, encouraging children to capture their creative journeys and share unique gifts inspired by nature. Every product supports your goal of creative connection and environmental stewardship. Take your next art session further by exploring our solutions for nature-loving families. Visit The Zoofamily now for tools that nurture creativity and help preserve the beauty of the planet—when you act today, you help us plant a tree for each camera sold. Start creating lasting memories and see how every small action makes a difference.
Frequently Asked Questions
How do I prepare leaves for art projects?
To prepare leaves for your art projects, collect fresh and flexible leaves, avoiding brittle or damaged ones. Press them between the pages of a heavy book with parchment paper for 3-5 days to dry and maintain their shape.
What tools do I need for creating leaf art?
Essential tools for leaf art include sharp scissors, tweezers, adhesives, watercolour paper or sturdy cardstock, and preservation materials like wax paper or clear acrylic spray for finishing touches.
Can I use different techniques for leaf art?
Yes, there are various techniques you can explore, such as leaf printing, rubbings, collages, silhouette art, and mixed media compositions. Each method offers unique results and allows for creativity in your artwork.
How can I preserve my leaf artwork?
To preserve your leaf art, consider using archival quality sealants, lamination, or museum-grade preservation glass. Store finished pieces in cool, dry environments and document them through high-quality photographs.